Hello again friends.

image

Dear friends,

My oh my how quickly the time passes by us. I left SO abruptly due to Nursingn School. The light is finally shining at the end of the tunnel and I can’t wait for May!

Loving this weather, the fact that it’s almost Christmas again, and I have lots of crafts and DIY’s to share.

Stay tuned…

Mint to be…Painting a Fabric Purse Tutorial (part 2)

Please excuse the corny title.. but I can’t help it. This was one of the coolest projects that I have done with my Martha Stewart paints and it was a HUGE MONUMENTAL success! Believe me, there have been some other projects where I have literally thrown my hands up in the air and cried towards the heavens “Why Martha? WHY? Why does it look so easy on your amazing website and yet it is a disaster at home?”

Have you ever heard of Pinterestfail.com? For those of you who loooove Pinterest as much as I do, this website is hilarious and pretty much the anti-pinterest, an assortment of pins gone wrong…rogue-pins if you will. You know all of those pins that are in your “Craft” or “Make” board? Yeah, these are the people that have ACTUALLY had the time to craft it up AND THEN document how things are not as easy as Pinterest or Martha make you think they are! That’s why this project was SO great, because it really was easy AND it worked really well. Take THAT PINTERESTFAIL!

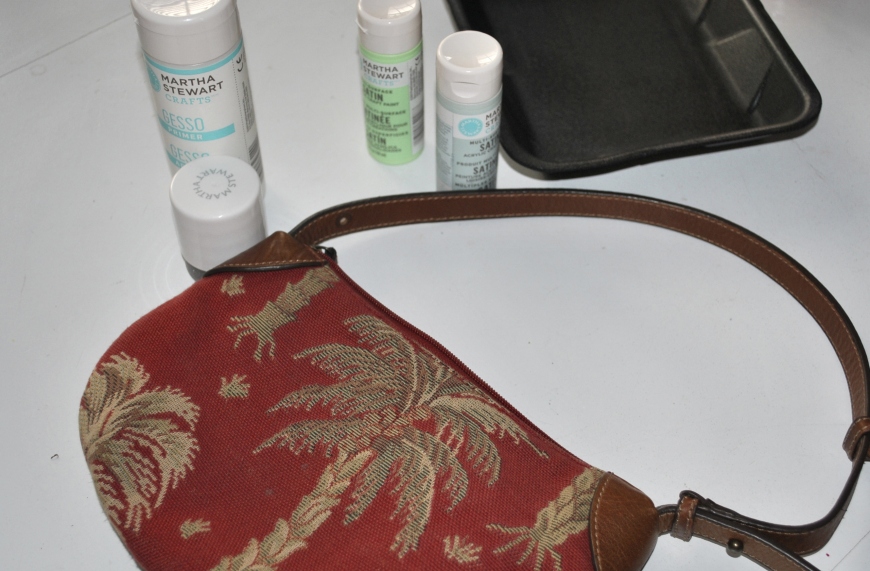
Back to my monumental success— Have you ever looked at something and said, “if only this came in mint”? Am I the only one? Well, let’s move on… I recently cleaned out a box from the garage and found this beachy, red Tommy Bahama purse in the bottom. It screamed at me “GET ME OUT OF HERE!” I took it out, inspected it, realized that it was in fact not mine (a sister had left it behind), and tried to picture myself with a red Tommy Bahama beach purse. I couldn’t! All I could think about was “Man, if only this was in that pretty mint color!” I then realized that the great Martha Stewart paints that I had received for Christmas were still untouched in their box. I took out everything I needed and started painting that beachy, palm tree mess into my minty purse. Somewhere in the world Mr. Tommy Bahama, whoever he is, is very mad at me…

Think that painting fabric is too complicated?!? Don’t you worry, it’s actually quite easy AND fun!

What you’ll need:

Martha Stewart Paints

*Gesso Primer

*Tintable Fabric Medium

*Color paints (I chose Mint and Cloud and mixed them to get the perfect color)

Thick paint brush

Paint Sponges

Wet paper towel or wet q-tips

Paint palette (I used an old vegetable tray and it worked SO well) AND/OR Paint bowl (I used an old glass bowl from our kitchen that has seen better days)

STEP ONEStep One:

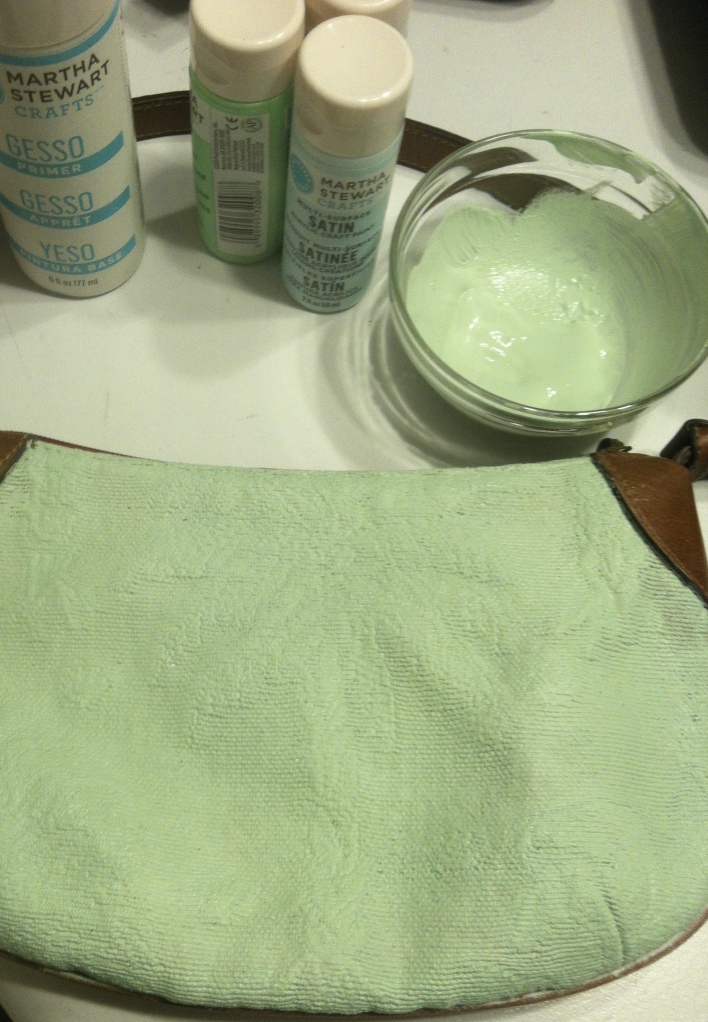
Prime the entire fabric area with the Gesso primer using a thick paint brush so you’re getting full coverage. The Gesso ensures that the paint holds on to the fabric and it gives you a nice clean white palette. Can you imagine what that green/blue mint color would look like over the red? Disaster.

Step One FOR realStep Two:

While you let the primer dry, mix the two colors together and follow the instructions on the fabric medium bottle. Get it to just the right color and then paint it on with the sponge.

DSC_0222-001See those edges with the white? That’s where the wet paper towel or q-tip come in. You can clean those edges easily after you’ve painted.

Step Three: Do the other side and let it dry! YOU ARE DONE.

photo (6)-002

20130328-234154.jpg

Beautiful and ready for spring! I love how it almost looks crocheted.

Already looking for my next painting victim— what will be next???

I love you so.

Valentimes Day

Valentines Day (or Valentimes or VDay) is coming up and I am SO excited. Though I think we need to show our loved ones that we love them EVERY DAY, this day means that you can show LOTS of people love and they won’t think you’re weird. It’s time to shower your loved ones with kisses or breakfasts in bed, or if they’re your brother or a neighbor or a stranger then just shower them with hugs or firm handshakes or gentle “hi” nods (maybe not all of those at once) they’ll know it’s code for “it’s Valentines day and I think you’re awesome, and you are loved”.

When we were growing up, my sisters and I were taught to be creative about holidays. For Christmas we would make ornaments ourselves, for Halloween sometimes our costumes were old dresses that we accessorized with things around the house (don’t get me started on my costume as a witch for three straight years), and for Valentines Day we made bookmarks instead of buying the boxes of cards at the store. At the time I thought that it was some sort of torture, having to MAKE something instead of going out and buying things LIKE ALL MY FRIENDS…. but now, I can’t imagine how my parents must have done .. well, everything… with four daughters. Each one needing something ALL THE TIME. How budget savvy of them……..

I remember we would buy poster board and cut out rectangles. Then we’d use all of our markers and pens  and draw hearts and “i love you’s” all over them. Then mom would bring out some yarn and we would hole punch the tops and slide the yarn through. She patiently taught us how to make it so that the loop was at the bottom and the yarn was left at the top. How creative was she?! I mean, we thought it was kinda boring and a little nerdy that we were handing out bookmarks as valentines… but I’m so thankful for that creativity now.

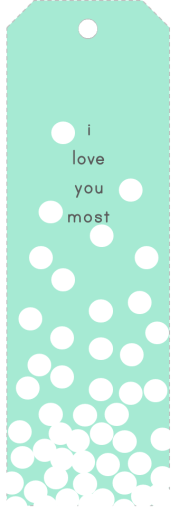
In honor of my mother and how much she loves us … here are some bookmarks to hand out as valentines. They’re not as cute as the ones that we made when we were younger, with scribbles and glitter from our glitter pens, but they’ll do. Hope you enjoy and hand them out to those you love this week…………………….

photo (6)-001 photo (7)-001Mint and white Bookmark I loveyoubookmark Chevron Bookmark

heart bookmark pink polkies bookmark

Download them here: VDay Bookmarks

i LOVE you so.

Recipe: Arroz con Leche

yum yum yum

What is it about our mom’s cooking? It’s the most amazing thing when you’re sick, you’re feeling down, or you just want some comfort.

Today I am home sick from work, feeling lousy, and tired.. and all I wanted was to call my mom and ask her to make me my favorite sickie food- arroz con leche (rice pudding for my non-spanish-speaking-friends. This translation is a little deceiving because it’s not really pudding or made from pudding but whatevs). This stuff is AMAZING and makes me feel better instantly. It’s sweet and yummy and reminds me of my sisters and I sitting in the kitchen with mom and watching her make it. The smell of cinnamon and sugar taking over the kitchen and counting the minutes before we could scoop it out and enjoy.

My mom is Mexico this month, visiting my grandmother, and I can’t call her to come and make me something that will make me feel special and not so alone while I’m sick. So I went into the kitchen, not really sure of what I had in the panty, but knowing that rice pudding was going to happen today. My hubby drove me home from work so I had no car to drive out and get other ingredients. I had to make do with what was already here, and as I peered into the pantry, it was slim pickings.

However, thankfully, I found a bag of white rice, sugar, and a can of condensed milk (the makings of the perfect arroz con leche). I was slightly annoyed when I found out that I had a cup and a half of milk in the fridge and no cinnamon sticks (you need whole milk and those dang cinnamon sticks for the real deal). SIGH. I put on my thinking cap, decided that I wasn’t going to go and sleep off my sickness hungry, and started an impromptu recipe…er…maybe not recipe, just a mixing together of some ingredients that would hopefully resemble my mom’s delicious arroz.

After 30 minutes, I was done.. and it was NOT my mom’s perfect, delectable dessert, but it wasn’t bad… and I had two servings before I tucked myself into bed, felt my Sadie cuddle up next to me, and drifted off into wonderful sleep, belly full.

SUCCESS.

Mom’s Arroz Con Leche (an improvised version)

1 cup of rice

1 cup of water

1 cup of milk

1/4 cup of sugar

1/4 cup of condensed milk

1/4 tablespoon of cinnamon
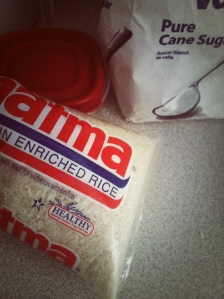
ingredients minus the cimmanom :)

First, following the directions on the rice bag, I mixed the cup of milk and the cup of water in a pot and set it to boil. I mixed in the cinnamon and let the aroma fill the room. YUM. (Don’t let this boil over, as I did, and almost cause a fire in your house, as. I. did.)

milk and water mix

While you’re waiting for this mixture to boil, soak the rice in water for about 5 minutes then drain. When the water/milk mix is boiling add the rice and stir. Bring to a simmer and cover, stirring every couple of minutes. Set your timer for 20 minutes. After 18 minutes add the sugar little by little and keep stirring! The rice should be nice and thick and there should be a little bit of liquid left.
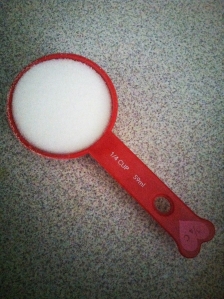
1/4 cup of sugar

Next, add the condensed milk and stir.

LOVE condensed milk

Cover again for the last couple of minutes. Then take off the heat and let sit for a few minutes before serving. Sprinkle some cinnamon on top and you’re done!

YUM

SERVE WARM AND ENJOY.

It’s not my mom’s arroz, but it sure hit the spot. When I call my mom this week I’ll ask her for her real recipe and post…

i love and miss you so, mom.

Burlap Lamp Shade Tutorial

Rainy days make you want to just drink some hot tea, snuggle on the couch, and nap. Is it just me? I didn’t think so…. I decided though, that the rainy day would be a good time for a little craft project since there aren’t any books that I’ve been interested in reading for a bit, and let’s face it, when is it not a good time for a craft project??

When I first bought our bedside lamps to go in our first home as  man and wife, almost (*cough*) 6 years ago, I thought they were perfect. Old and ornate, they looked amazing. What really bothered me about these $40 dollar lamps (aside from the price– who knew lamps were so expensive!) were the lamp shades. They were a tired brown color with… a feather and beaded fringe. Sigh.

About a year after I purchased the lamps, we moved, and the decor in the new place just wasn’t meshing with the brown lampshades with fringe. I decided to rip the fringe, feathers and all. And from there is was a disaster zone (except for the leftover beads, which would later become jewelry.) They’d been sitting in our bedroom with a few pieces of feathers still stuck to the rim for the past couple of years… and they needed, no, demanded a face lift.

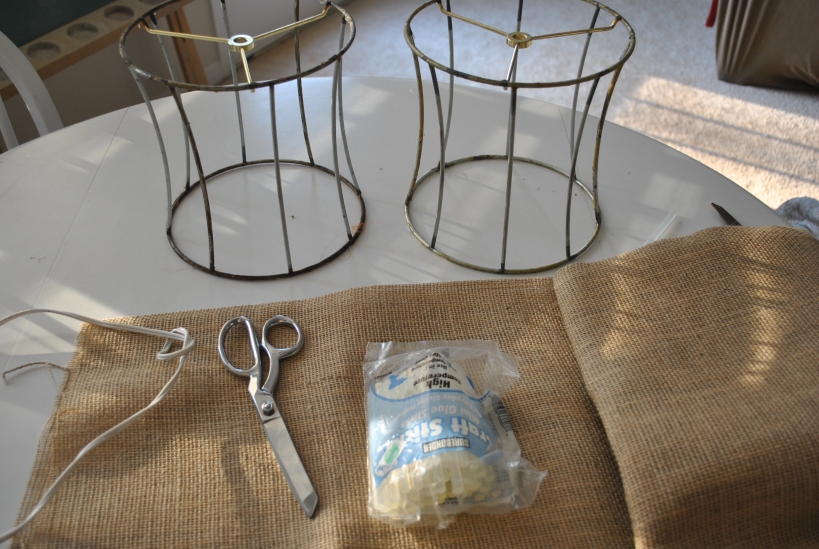
I took off all of the fabric with my handy dandy fabric scissors (a gift from my sil who lives in FL) and ended up with two lamp shade frames….so this is what lampshades are made of

I admit, at this point, I was all..hmm, 1. Did I make the right choice by destroying these lampshades? and 2. Would they both be face lifted by the time my hubby walked in the door? (I think about these things because if they had not been completed and he had walked in, me with glue gun in hand, hair frazzled, almost in tears and giving up on all things burlap, he would have been pretty upset. And he would have complained that his lamp was missing its shade)

Materials

I decided to continue. I measured the height and figured I’d leave about 2 1/2 inches so that there would be an 1 1/4 inch on top and bottom to finish the project. I cut my burlap, plugged in my glue gun, and got to work.

I took it little by little and applied glue to the base then pulled the fabric tight and up against it. IT TOOK FOREVER. By the time I got to the second lamp shade, the skies had cleared and glorious sunlight broke through… and I wished I hadn’t started my project because I wanted to be outside since the sun was out (and because it was not that easy.) But I carried on- and thank goodness I did because I was amazed that some strips of burlap (and some hard work) paid off:

I cut the top and bottom fabric to leave about a 1/2 an inch and then glued the top and bottom pieces to the frame.

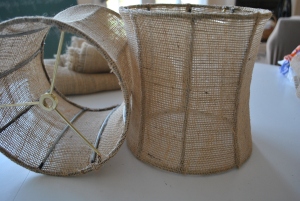
and now they sit pretty on our nightstands…

I love you so………………………….

Pretty Little Lampshades

When I started thinking about redecorating the master bedroom I had no idea what I wanted to do, how I was going to start, or what I wanted it to look and feel like. I decided that I needed inspiration, and it came to me when I was at Scott’s Antique Market south of Atlanta with some friends. That weekend we decided that we were going to have a Pinterest party (more on that later) and what better way to start a Pinterest party than to go shopping for supplies!!!!!! I mean just look at this place.. so much to see and buy!

And now.. some Scott’s Antique Market eye candy:

Then, out of nowhere, was this overwhelming feeling of love when I saw more and more things made with burlap:

It was love at first sight when I helped with my friend’s wedding in which burlap was used EVERYWHERE… and this only intensified that love.  Decision: use as much burlap as possible in the master bedroom (and everywhere in the house actually.)

SO, in my first attempt to introduce burlap into my home, I decided that I would revitalize my old lampshades and bring out the hot glue gun… and voila!

burlap lampshades

I’ll post a tutorial soon..

i love you so, dear burlap.